Onboard uses Liquid markup, a powerful and flexible markup language, to render information stored in Stripe to your emails. We refer to the tags that render this dynamic content as 'Liquid tags' – but it's the same basic principle as 'merge tags', 'mail merge' and other such dynamic content methods.
You can use Liquid tags to render things such as a customer's name, their current subscription plan name or cost, the date their subscription renews and so on.
You can use Liquid tags to render (pretty much) anything stored in a Stripe customer object, subscription object or, if sending a payment receipt email, an invoice object.
Liquid tags can be used in the email body content as well as in subject lines.
Basics usage of Liquid tags
Let's look at a basic Liquid tag:
Dear {{ customer.name | default: 'customer' }},
This is a Liquid tag that renders the customer's name as stored on their Stripe customer object. For example, if the customer's name is stored as 'Joe' in Stripe, the tag above would output "Dear Joe,".
But what if some of your customer's don't have their name stored in Stripe? That's where the "default: 'customer'" part comes in. You can use this to set a fallback value to use in case a value is not found in Stripe. In our example above, this would output "Dear customer,".
In the example above, "name" is the name of a property on Stripe's customer object. We can use Liquid tags to output any property on that object, for example:
{{ customer.phone }}
{{ customer.email }}
...and so on. We can even output nested values (such as addresses) like this:
Dear {{ customer.name | default 'customer' }}, how is the weather in {{ customer.address.city }}?
Useful liquid tags
Customer name:
Dear {{ customer.name | default: ‘customer’ }},
Date current period ends:
Your subscription will renew on {{ subscription.current_period_end | date: “%b %d” }}.
Days until trial period ends:
Your trial ends in {{ subscription.days_until_trial_end }} days.
Last 4 digits of card on file:
We'll charge the card ending in {{ customer.card.last4 }}.
Plan name:
Thanks for renewing your {{ subscription.plan.nickname }} subscription plan.
Plan amount:
Your subscription plan will renew for {{ subscription.plan.amount | money: subscription.plan.currency }}.
(Note: the two above apply if the customer has only one plan attached to their current subscription – the default for most Stripe users. If you use a more complex subscription model, you will need to iterate over your subscription items.)
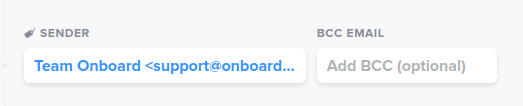
Sender name and email address:
This email was sent from {{sender.name}}. Reply to me on {{ sender.email }} if you have any further questions!
Tags for invoice receipt emails only
Invoice subtotal:
{{ invoice.subtotal | money : invoice.currency }}
Invoice tax:
{{ invoice.tax | money : invoice.currency }}
Total invoice discount:
{%if invoice.total_discount %}
Discount: -{{ invoice.total_discount | money: invoice.currency }}
{% endif %}
Invoice total:
{{ invoice.total | money : invoice.currency }}
Date invoice was paid:
{{ invoice.status_transitions.paid_at | date: "%b %d %Y" }}
A more complex example: an invoice receipt template:
<p>Dear {{ customer.name | default: 'customer' }},
<p>Thank you for your recent payment.</p>
<p>Invoice receipt number is {{ invoice.receipt_number }}.</p>
<p>Date: {{ invoice.status_transitions.paid_at | date: "%b %d %Y" }}.</p>
<table>
  <thead>
    <tr>
      <th>Description</th>
      <th>Amount</th>
    </tr>
  </thead>
  <tbody>
    {% for line in invoice.lines.data %}
      <tr>
        <td>{{ line.description }}: renews on {{ line.period.end | date "%b %d %Y" }}</td>
        <td>{{ line.amount | money: invoice.currency }}</td>
      </tr>
    {% endfor %}
    {%if invoice.total_discount %}
      <tr>
        <td>Discount</td>
        <td>-{{ invoice.total_discount | money: invoice.currency }}</td>
      </tr>
    {% endif %}
    <tr>
      <td>Subtotal</td><td>{{ invoice.subtotal | money: invoice.currency }}</td>
    </tr>
    <tr>
      <td>Tax</td><td>{{ invoice.tax | money: invoice.currency }}</td>
    </tr>
    <tr>
      <td><strong>Total</strong></td><td><strong>{{ invoice.total | money: invoice.currency }}</strong></td>
    </tr>
  </tbody>
</table>

<p>Thank you for your business.</p>
<p>Best,</p>
<p>{{sender.name}}</p> October 27, 2020